Fabric Bead Necklace

Marilou Projects Leave a Comment

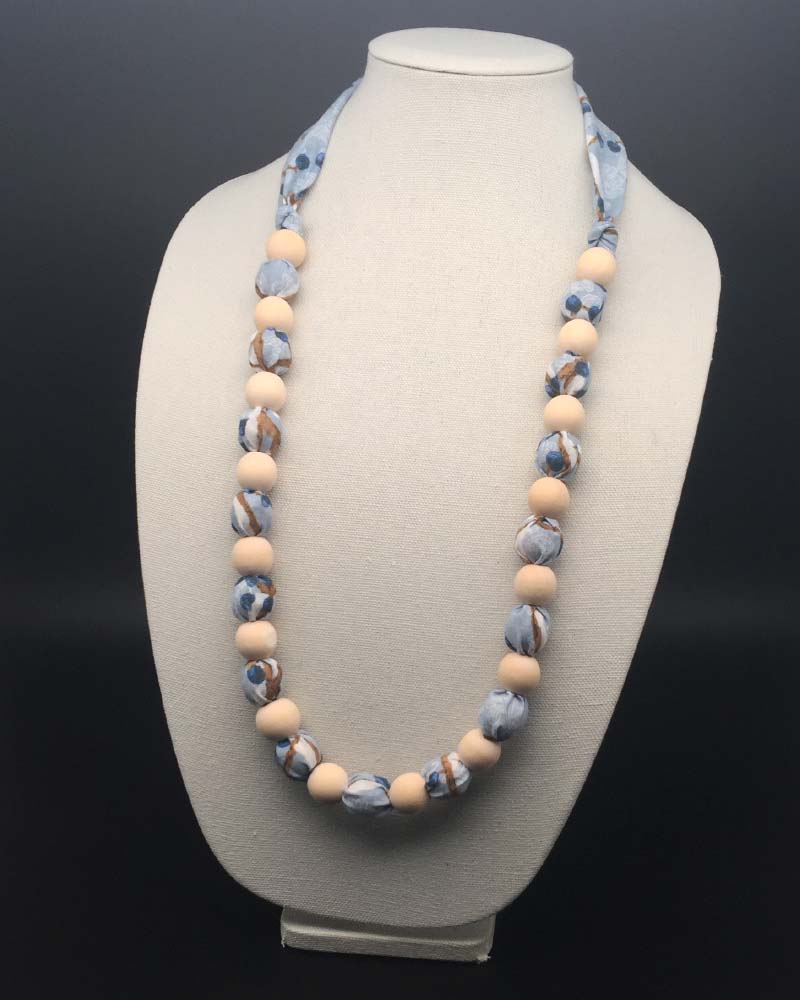
I've entered into a time in my life when I've been hearing that inherent human call to create something with my hands. While binge watching crafting videos on YouTube, I came across a video on how to make this fabric bead necklace. I watched the video and thought, "This looks like a quick and easy project." And I proceeded to answer that call by pulling out my scrap fabric, ordering some beads (as I didn't have them), and executing the labor of my hands.

When it came time to write this post, I began relaying quite honestly that this necklace project wasn't as quick and easy as I had expected it to be. I stopped writing when the thought occurred to me, "If I was selling the tutorial on how to make this necklace, no one would want to hear that it isn't "quick and easy".

Just imagine marketing that tutorial with the slogan of, "This fabric bead necklace is a bit challenging to make. It comes with trial and error and requires perseverance to be completed." After hearing that who is going to be interested in it?

It's kind of funny to think about. Life itself comes with that slogan. My life has its challenges. It comes with trial and error and it does require perseverance. But what is interesting, I am completely sold on it.

This fabric bead necklace is worth its weight in gold. In fact, it might be even more valuable than gold. For it gave me the "gift of life" while I was exerting that physical labor and managing to screw it up not once but twice. The third time was the charm. It came together beautifully that time but only because of everything I had learned through those first two attempts.

That's life.

Here's a not-so-quick-and-easy tutorial on how to make the fabric bead necklace:

How To Make A Fabric Bead Necklace

Supplies

  • Printed 100% cotton quilting fabric
  • 31 - 18mm natural wooden beads with a 6mm hole
  • Sewing machine
  • Scissors, needles, thread, (seam ripper in case you need to rip out stitches)
  • Iron and ironing board
Instructions
  1. Iron the wrinkles and creases out of the fabric.
  2. Cut a strip of fabric that is 3 inches in width and 40 inches in length.
  3. Fold fabric in half lengthwise with the right sides together.
  4. Sew 1/2 inch from the cut edges (not from the folded edge). Leave the ends unsewn.
  5. Trim seam allowance.
  6. Turn the sewn fabric right side out.
  7. Pull one end of the fabric through the hole of the first bead and slide the bead till it is several inches away from the other end of the fabric . Tip: To pull the fabric through the hole of the bead, I sewed a few large stitches on the end of the fabric using a tapestry needle threaded with heavy duty thread. Sewing those stitches anchored the thread so it wouldn't come out while pulling the fabric through the hole. Just don't sew the end closed or you won't be able to insert the beads into the fabric.
  8. Insert the second bead into the fabric and slide it next to the first bead.
  9. Repeat steps 7 and 8 until all 31 beads are inserted in or slid on the fabric.
  10. Arrange the beads until they are evenly placed and there's the same amount of fabric on each end.
  11. Tie a knot at each end of the beads. This is to hold the beads in place so they don't slide out of place.
  12. At one end of the necklace, fold the fabric in approximately 1/4 inch. Finger press the fold.
  13. Take the other end of the necklace, slip it into the folded end, aligning up the seam. Stitch along the folded edge using a needle and thread. The necklace is completed.
Notes
5 1 vote
Rating
guest

0 Comments
Inline Feedbacks
View all comments