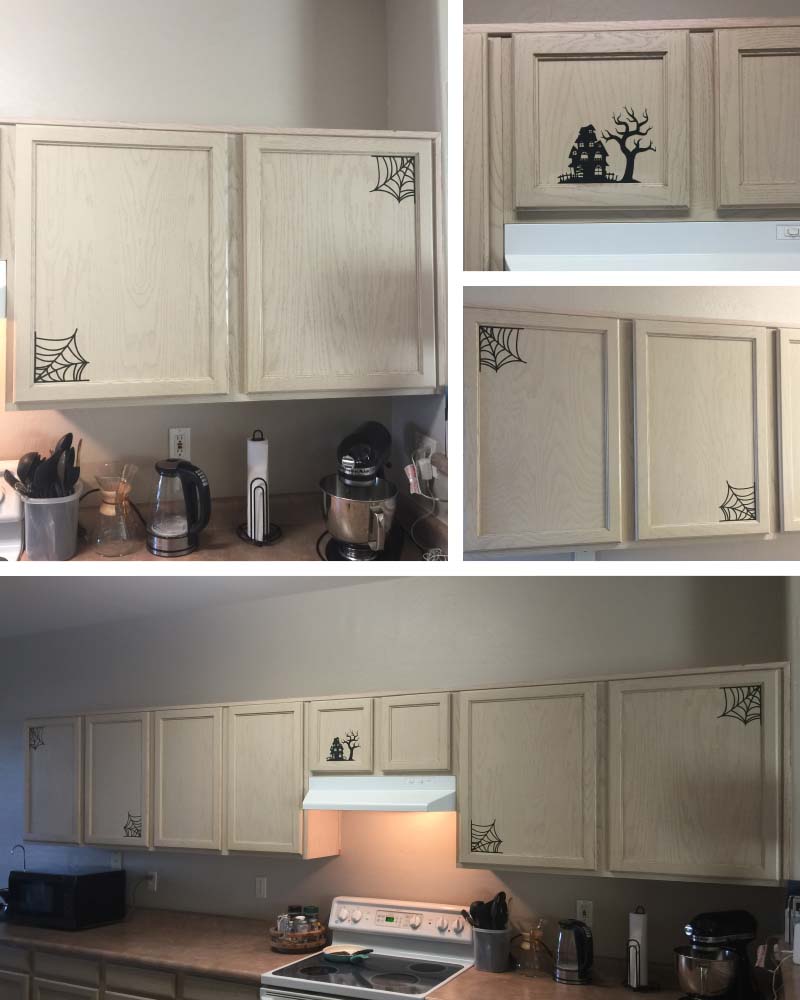
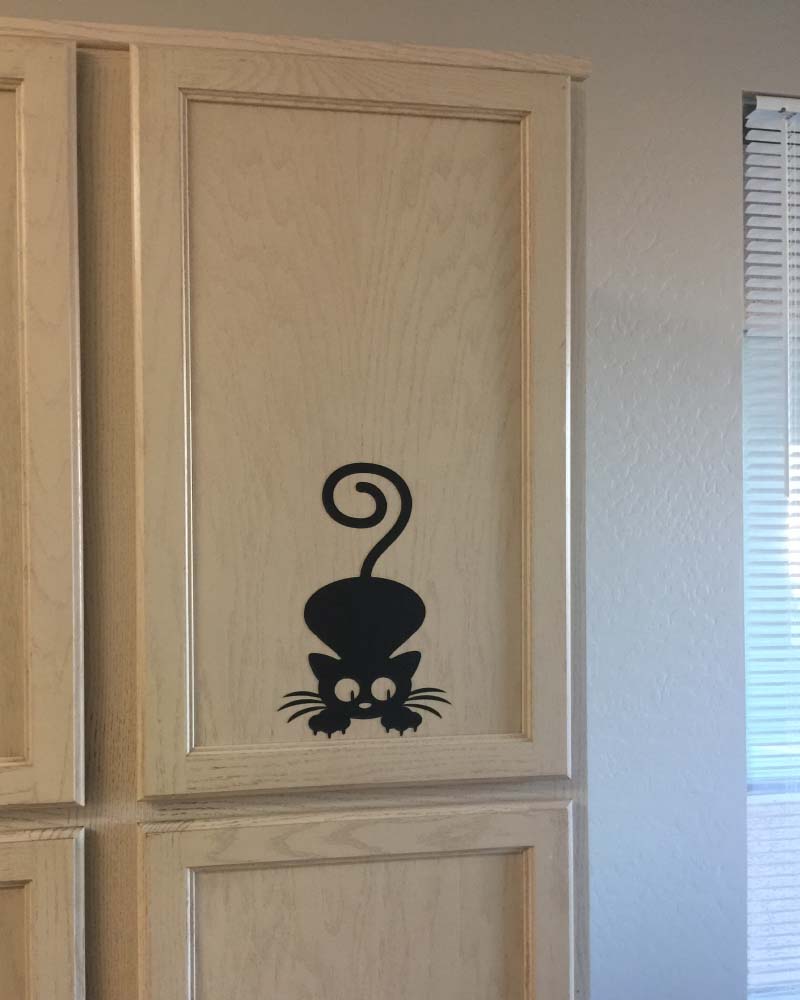
Featured in the photo above are the fabric decals I made and put up in our kitchen for Halloween. I may have been pushing the deadline in getting these decorations up (I got them up only a few days before Halloween), but we still got plenty of enjoyment out of 'em. The black cat on the pantry cupboard door stole the show (see photo below).
Scroll down to see how to make the fabric decals.
How To Make Fabric Decals
Supplies
- Black 100% cotton quilting fabric
- White contact paper
- Heat N Bond UltraHold
- Scissors, xacto knife, or an electronic diecutter (I used the latter - a Silhouette Cameo 3)
- Halloween shapes to print, trace, and cut out. Or SVG files that can be uploaded into your diecutter
- Iron with a nonstick plate and ironing board
- Spray bottle filled with distilled water
- Pressing cloth or parchment paper (optional)
Instructions
- Iron the wrinkles and creases out of the fabric. You can use the steam generated by the iron, but I prefer to spritz the fabric with distilled water and iron it with a dry iron. I iron it until the fabric is completely dry.
- Cut the Heat N Bond UltraHold to the size needed for the decals.
- Cut the fabric and contact paper a little larger than the Heat N Bond UltraHold, to ensure the Heat N Bond UltraHold doesn't get fused to the iron or ironing board.
- Using a dry iron on the silk setting, fuse the Heat N Bond UltraHold to the fabric, following the instructions on Heat N Bond UltraHold's package.
- Trim off the excess fabric.
- Fuse the fabric to the contact paper, once again following the instructions on the Heat N Bond UltraHold's package. Please note: the Heat N Bond UltraHold adhesive might soak through the fabric a bit. This is actually a benefit as it helps stiffen the fabric further, which is a good thing when cutting it with a diecutting machine. You can use a press cloth or parchment paper to prevent the iron from getting the adhesive on it. I don't because I have an iron with a nonstick plate and any residue comes right off when I rub it on a scrap of fabric while it's still hot.
- Trim off the excess contact paper.
- Cut out the decals. Stick up on the cupboard door or wall (make sure the surface you are sticking the decals on is clean and completely dry).
Notes
In my experience, the decals can be repositioned numerous times (don't go overboard or the decals will lose their stickiness). There is the possibility that the decals might leave just a small amount of sticky residue behind when being peeled off. I've had that happen but the residue isn't very sticky and I was able to rub it off using my fingers. The decals don't damage the varnish or paint, however, I still recommend testing a sample decal in an inconspicuous area beforehand to see how it will perform on the surface it is being applied to.